
Netkiosk imperi kiosk software.
Your complete kiosk software solution


Netkiosk imperi is a professional kiosk software designed for Windows 11, 10 and MacOS operating systems. Here’s what you can achieve with Netkiosk imperi:
- Secure Kiosk Mode: Instantly lock down your PCs into a secure kiosk mode, allowing access only to a built-in, custom, and secure Chromium-powered kiosk browser.
- Website Restrictions: The admin can restrict access to one or more specific websites using the built-in white list and content filters. This ensures users stay focused on authorized content.
- Increased security. Netkiosk improves your PC’s security by preventing internal or external attacks. While Netkiosk runs users cannot download or install programs or malware locally of via a website, increasing your PC’s and network security.
- User-Friendly Admin Interface: Netkiosk has an easy-to-understand admin interface, making it accessible even if you’re not an IT expert. If you’re familiar with Windows, you’ll find it straightforward to install and use.
- No Permanent Changes: Netkiosk doesn’t interfere with your existing Windows settings. When Netkiosk is closed, the PC instantly unlocks back to normal Windows mode—no restart or log off needed.
- Custom Chromium Kiosk Browser: Netkiosk imperi uses its own custom version of Chromium, similar to the one used by Google Chrome. It prioritizes security, and you can customize it to suit your needs.
- Fully Tabbed Kiosk Browser: Netkiosk runs in full-screen kiosk mode on top of the Windows desktop. Users are allowed to use only the kiosk browser, preventing them from closing it. You can set your own home page and adjust layout options within the secure admin settings.
- Peace of mind and control guaranteed. For optimum security and peace of mind update capacities are not built-in inside Netkiosk. This means that Netkiosk cannot receive any automatic or manual updates from remote sources. And for a very good reason!
- Multi language version: Netkiosk admin settings are now also in German, French, Spanish, Portuguese, Italian, Arabic, Chinese, Japanese, Korean and Hindi.
However if your language is not listed you can edit the language settings to your own language in minutes.
What Microsoft says: Netkiosk imperi is designed to simplify securing your PC and providing controlled access to specific websites. It’s user-friendly and doesn’t make permanent changes to your Windows system. Explore the possibilities with Netkiosk!
Direct download link:
https://www.netkiosk.co.uk/download/NetkioskSetup.exe
Setup file size = 218 MB.
Space on disk needed: 600 MB / 1 GB.
See our help page for system requirements.
Netkiosk imperi requires three Microsoft programs.
Microsoft Visual C++ (X86 and X64) and Microsoft .Net Framework.
If Netkiosk won’t start for you the first time you need to install these.
Links to the official Microsoft download pages are on our help page.
We also include the installation files in the Netkiosk Setup programs.
After installation you will find the short cuts to the Microsoft programs on your desktop.
Netkiosk settings instructions.
We use screenshots taken directly from Netkiosk imperi.
Netkiosk setup on first installation.
Click the menu icon in the top right hand corner and click login.

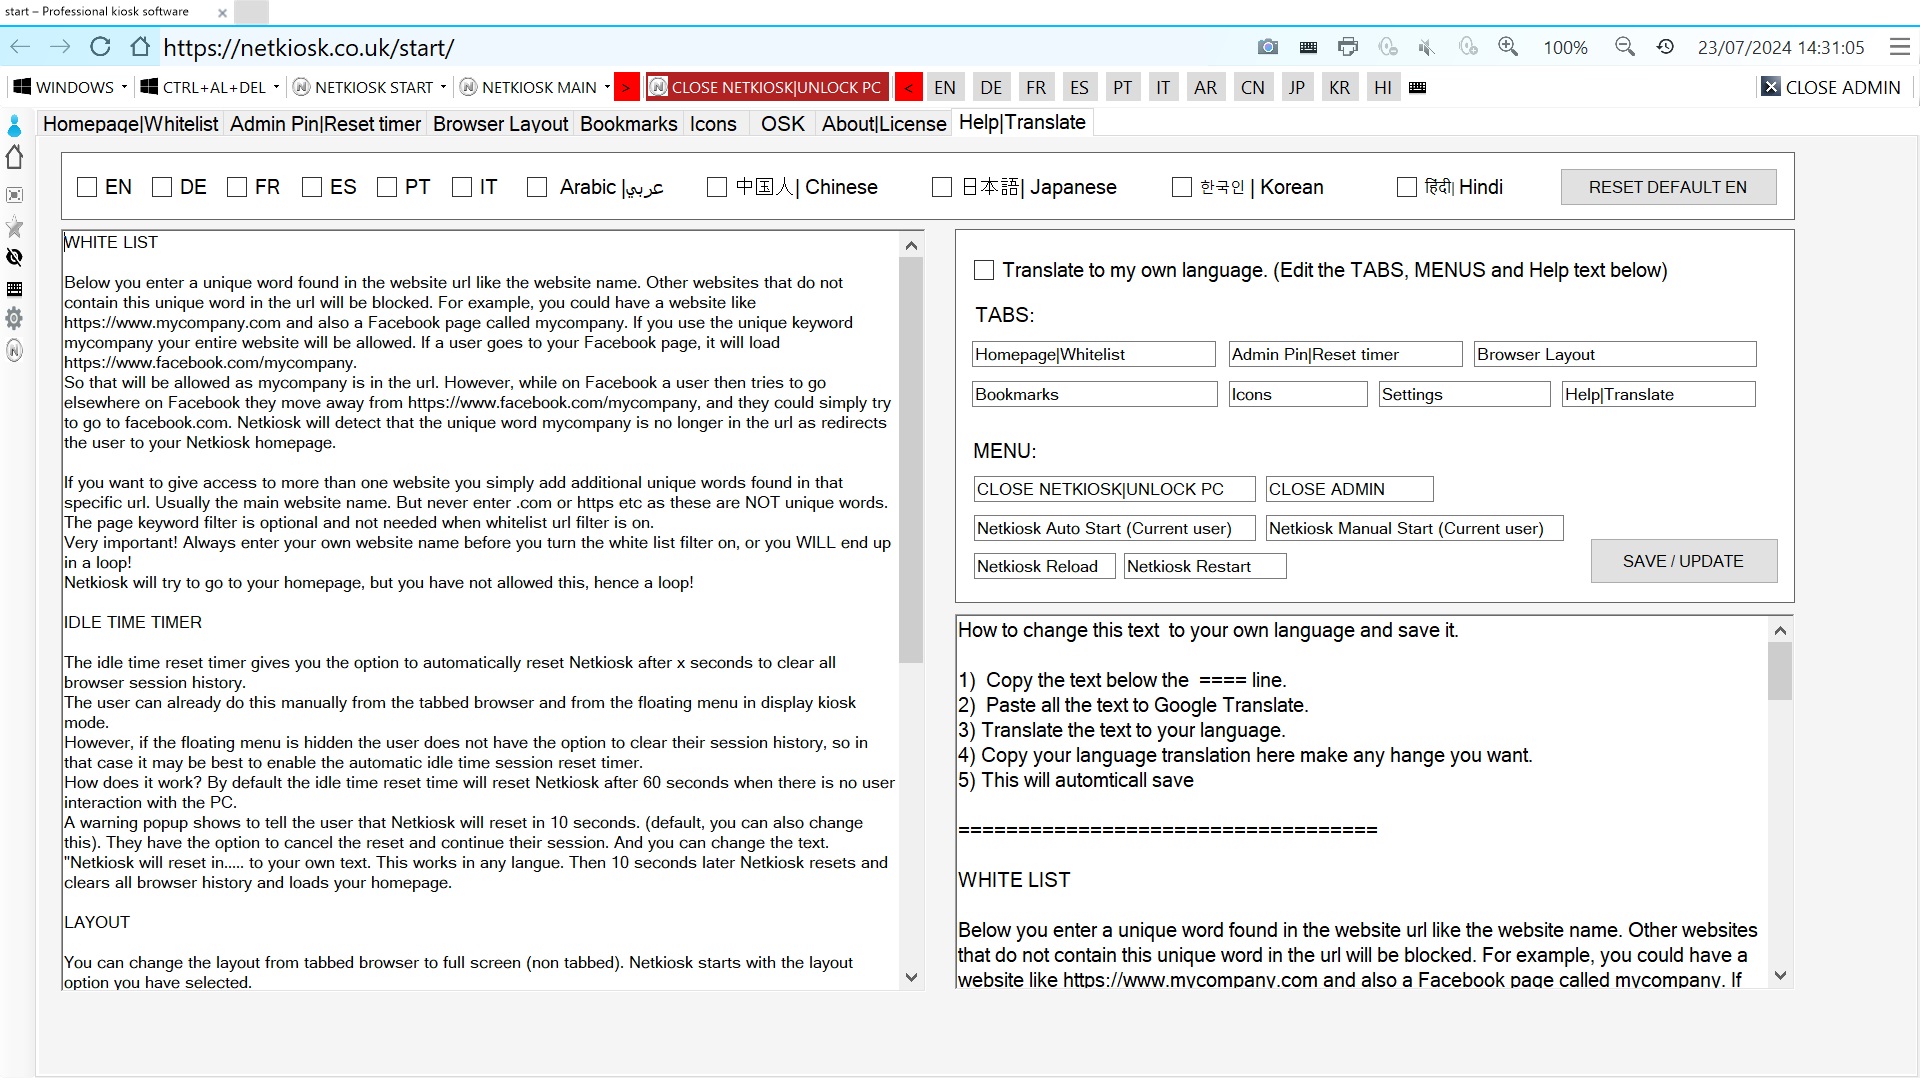
The new multilingual start page.
We have added a number of default languages to help you with the settings in your own language. If your language is not listed you can simply edit the text boxes on the right and select “Translate to my own language” You can also edit the text help file in the default languages as we have used Google translate for these so in case they might contain a few grammar or spelling errors you can correct these.
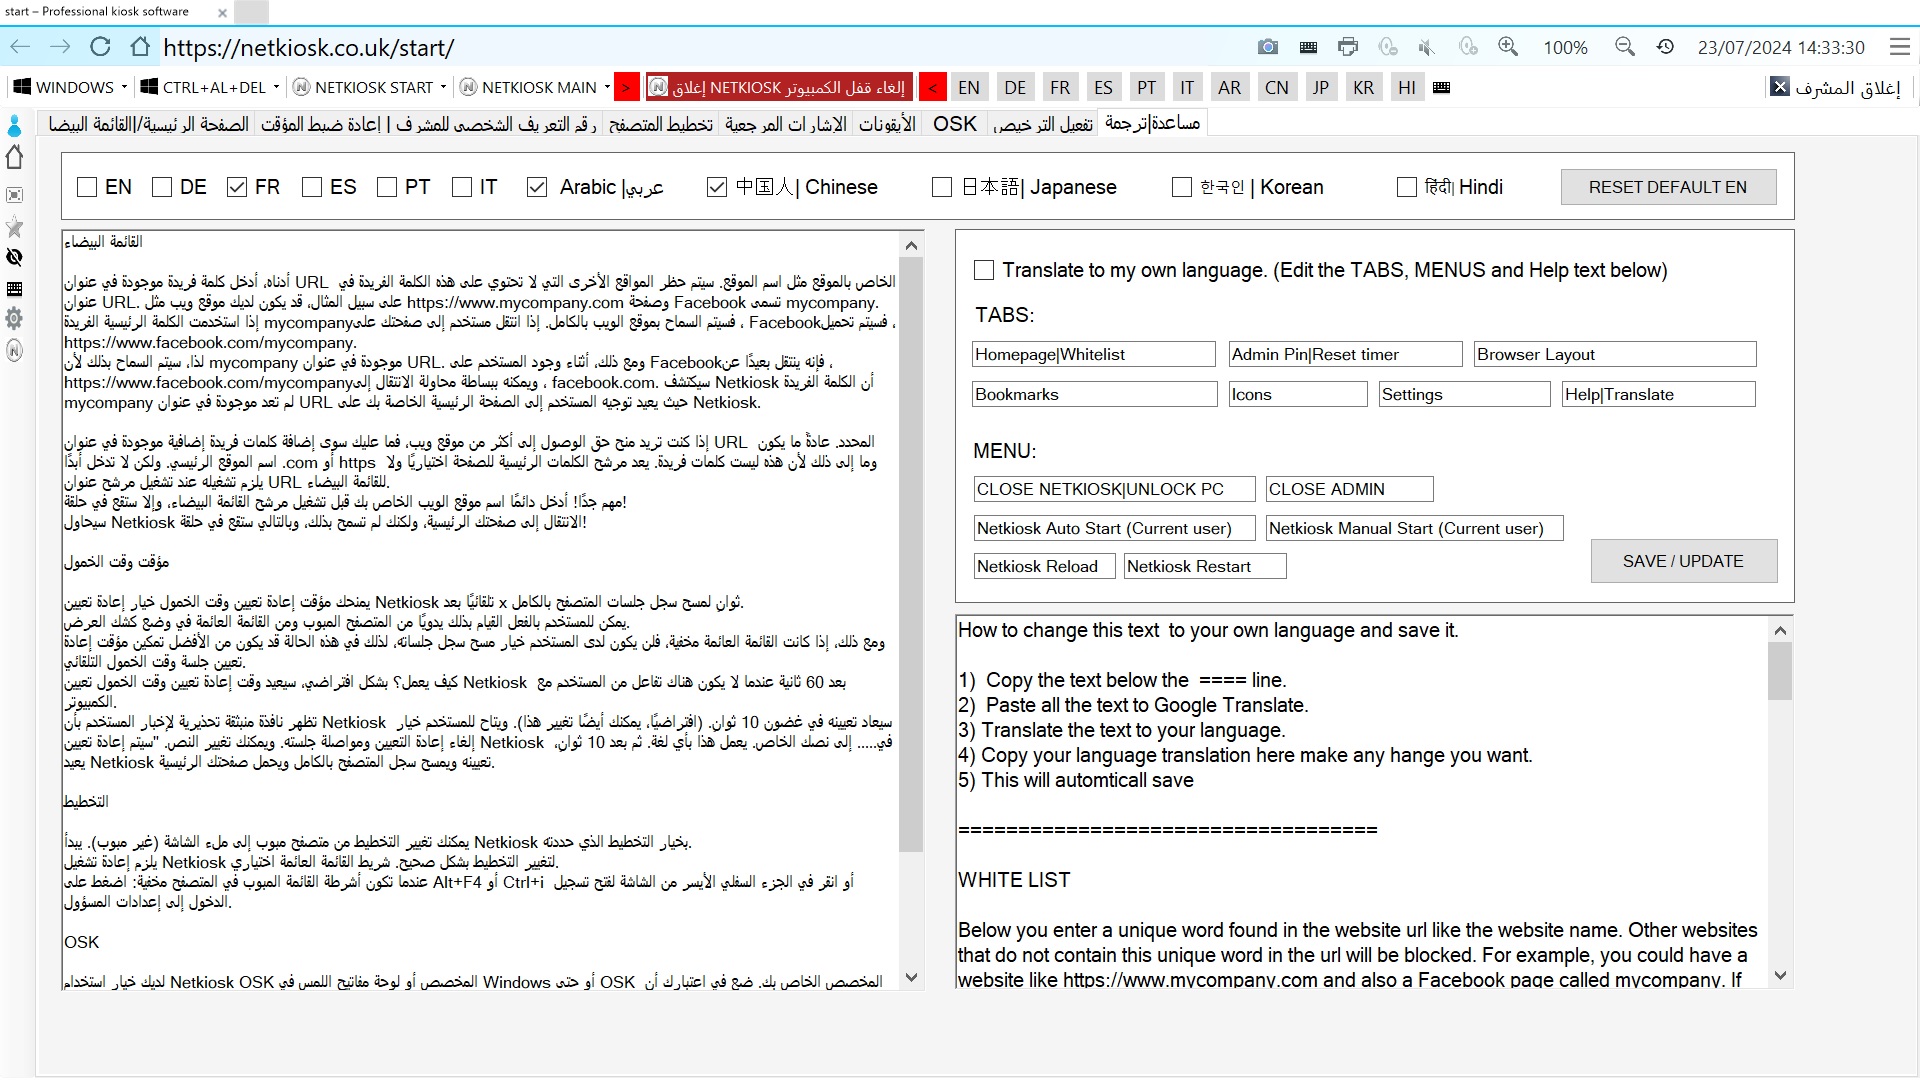
Any changes you make in the language text file are automatically saved. For instance, if you select Italian (IT) the next time you open admin panel then all settings will show up in Italian.
By default you can quickly Choose from English, German. French, Spanish, Portuguese, Arabic, Chinese, Japanese Korean or Hindi. Or translate the main settings menu text to your own language. You simple change the text text boxes on the right and select “Translate to my own language”
The language files: The language files are stored in the installation folder and are simple text files that you can edit externally if you want to. They are easy to find as they are called EN.txt, DE,txt etc.
Using a different language: To change the admin menus to a different language you can simply edit the text boxes under TABS and MENU direct in admin settings and use “Translate to my own language”. Next time you open admin settings your own language will show.

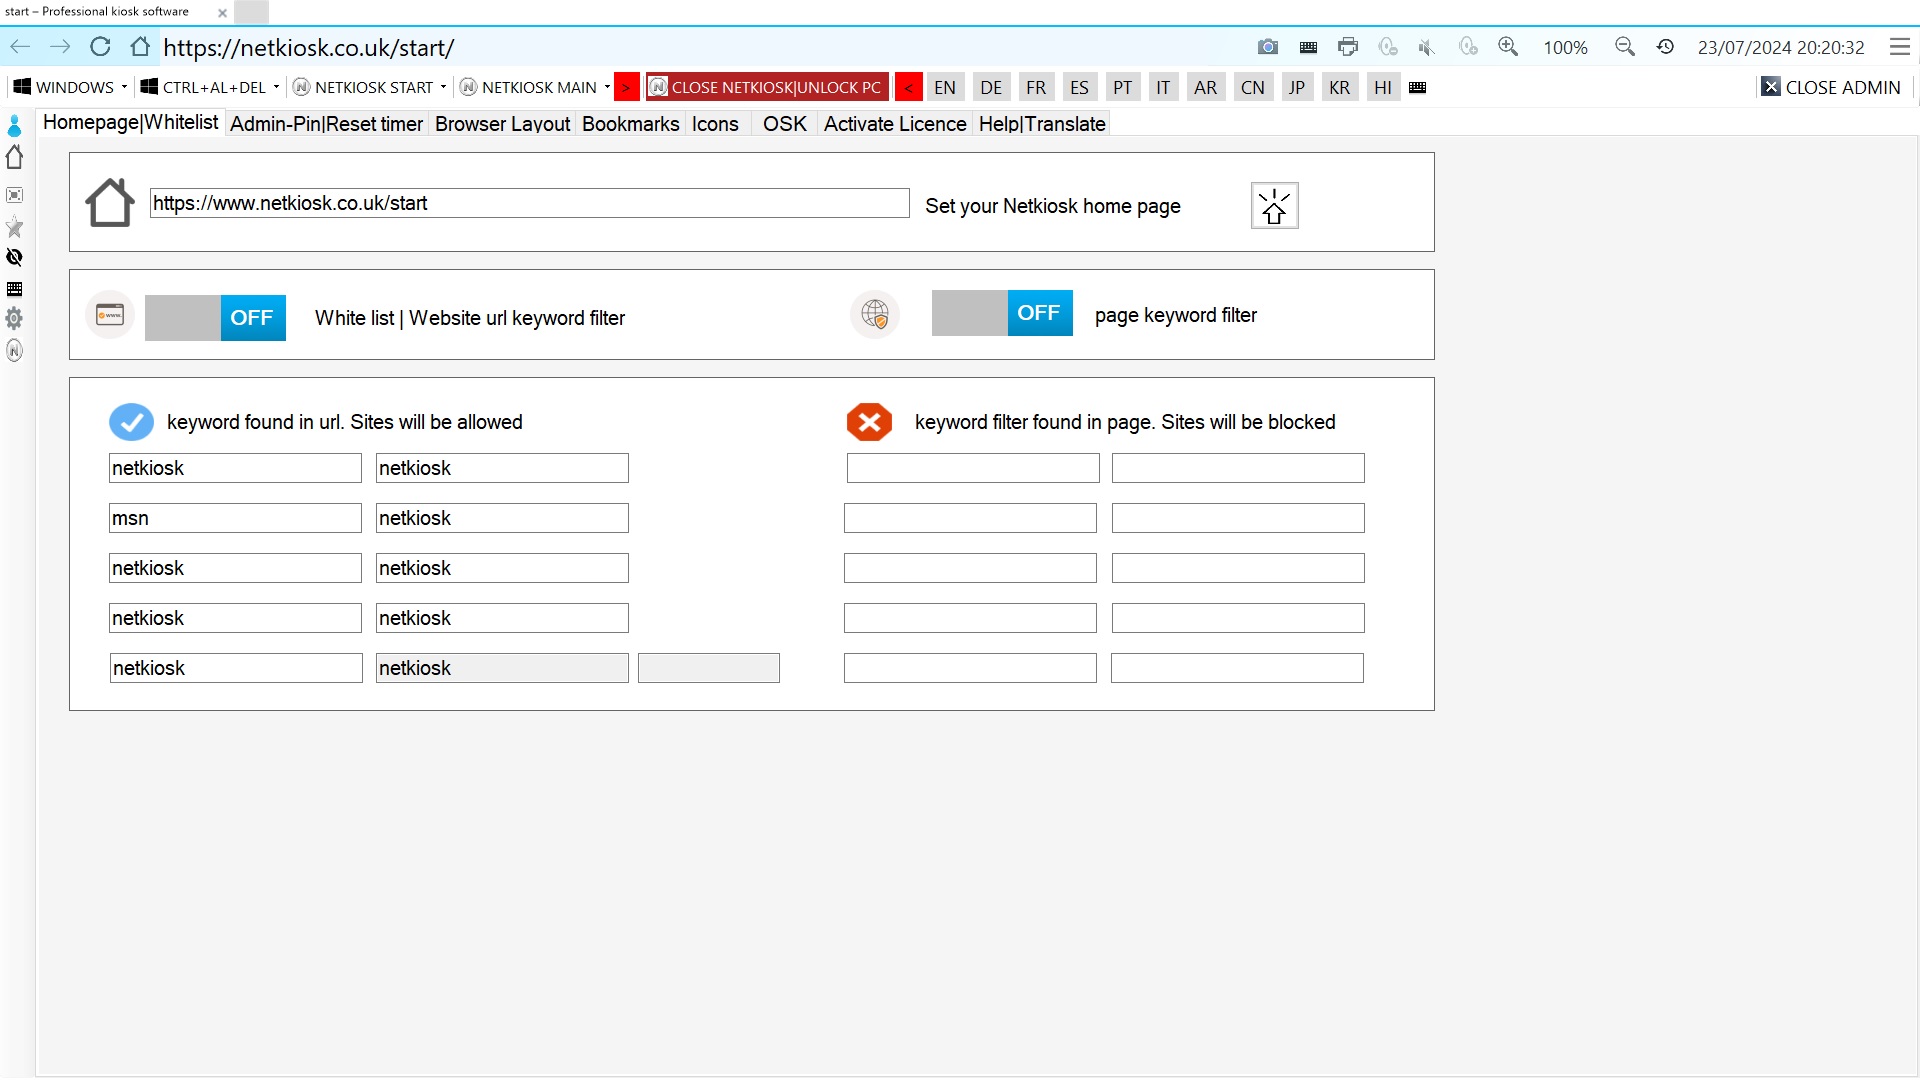
Set your home page.
This is usually the only website you want to grant access to. Change the default home page to your company or organisations website.
White list and content filter. This is optional.
Enter the keywords that are allowed in the url. Usually, your main website name is enough, as that is always constant. You can add other website names of the websites you want to give access to. The keyword content filter is optional. You can add keywords in your own language.
How does this content filter work?
Netkiosk checks the url for keywords, and not entire websites. With the white list enabled, if the keyword you have added to the white list is found in the url, the site is allowed, and if it is not found, the site is blocked and the user is redirected back to your Netkiosk home page. The content filter also works with the address bar hidden so you can also use it if you decide to run Netkiosk is full screen interactive display kiosk mode.
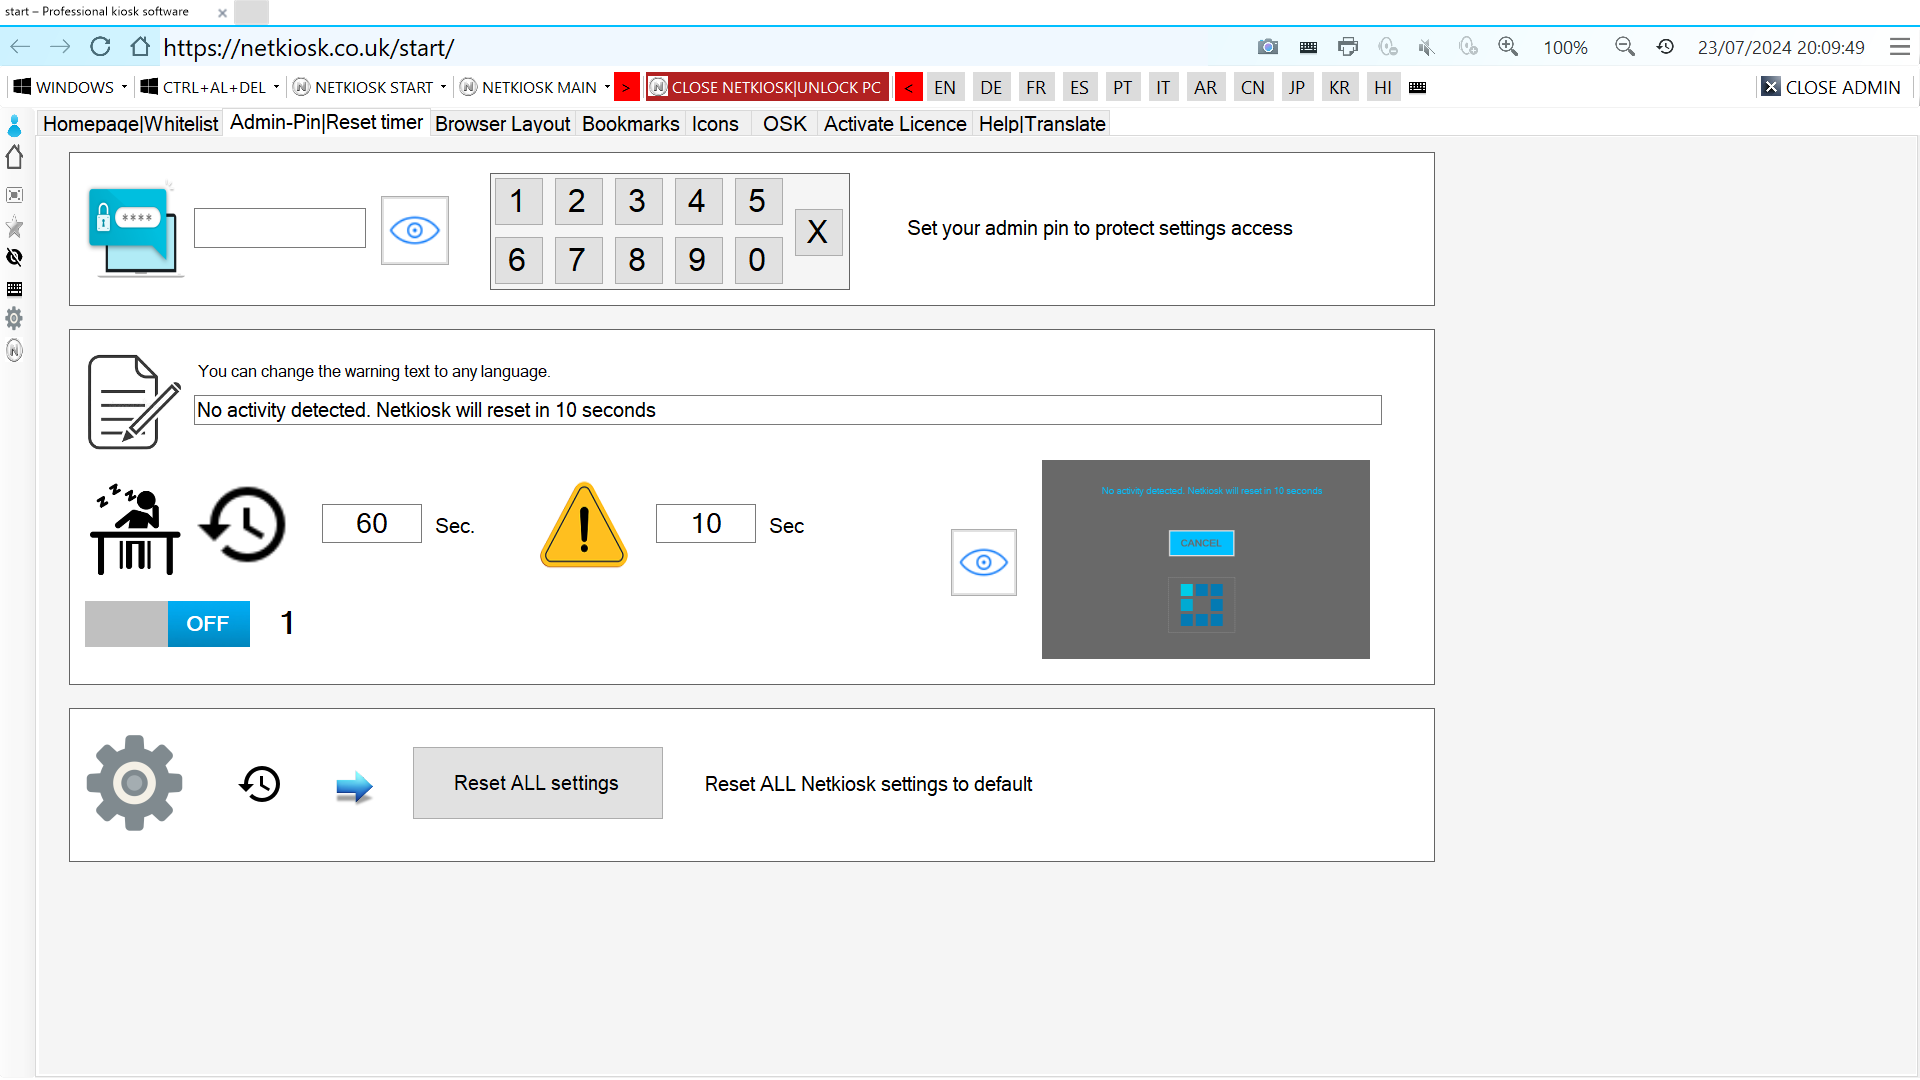
The secure admin pin
You set your admin pin in admin panel. After you have set your pin only admin can open settings with the secure admin pin. The pin can be a maximum of 4 numbers only! Do NOT forget this admin pin! If you can’t remember your pin contact us. For privacy reasons we won’t show you here how to restore it.

The idle time reset timer.
You can enable the auto-reset timer. This automatically resets the user’s session after x minutes. A warning popup will appear to tell the user that Netkiosk is about to reset. The user has the option to cancel the reset if they need to continue some work they were doing. Netkiosk will clear all browser history, cookies, and session history on reset.
Reset settings to default: There is also an option to instantly reset all the settings back to default.
A quick Close Netkiosk and unlock PC is now clearly visible. (For admin only of course)
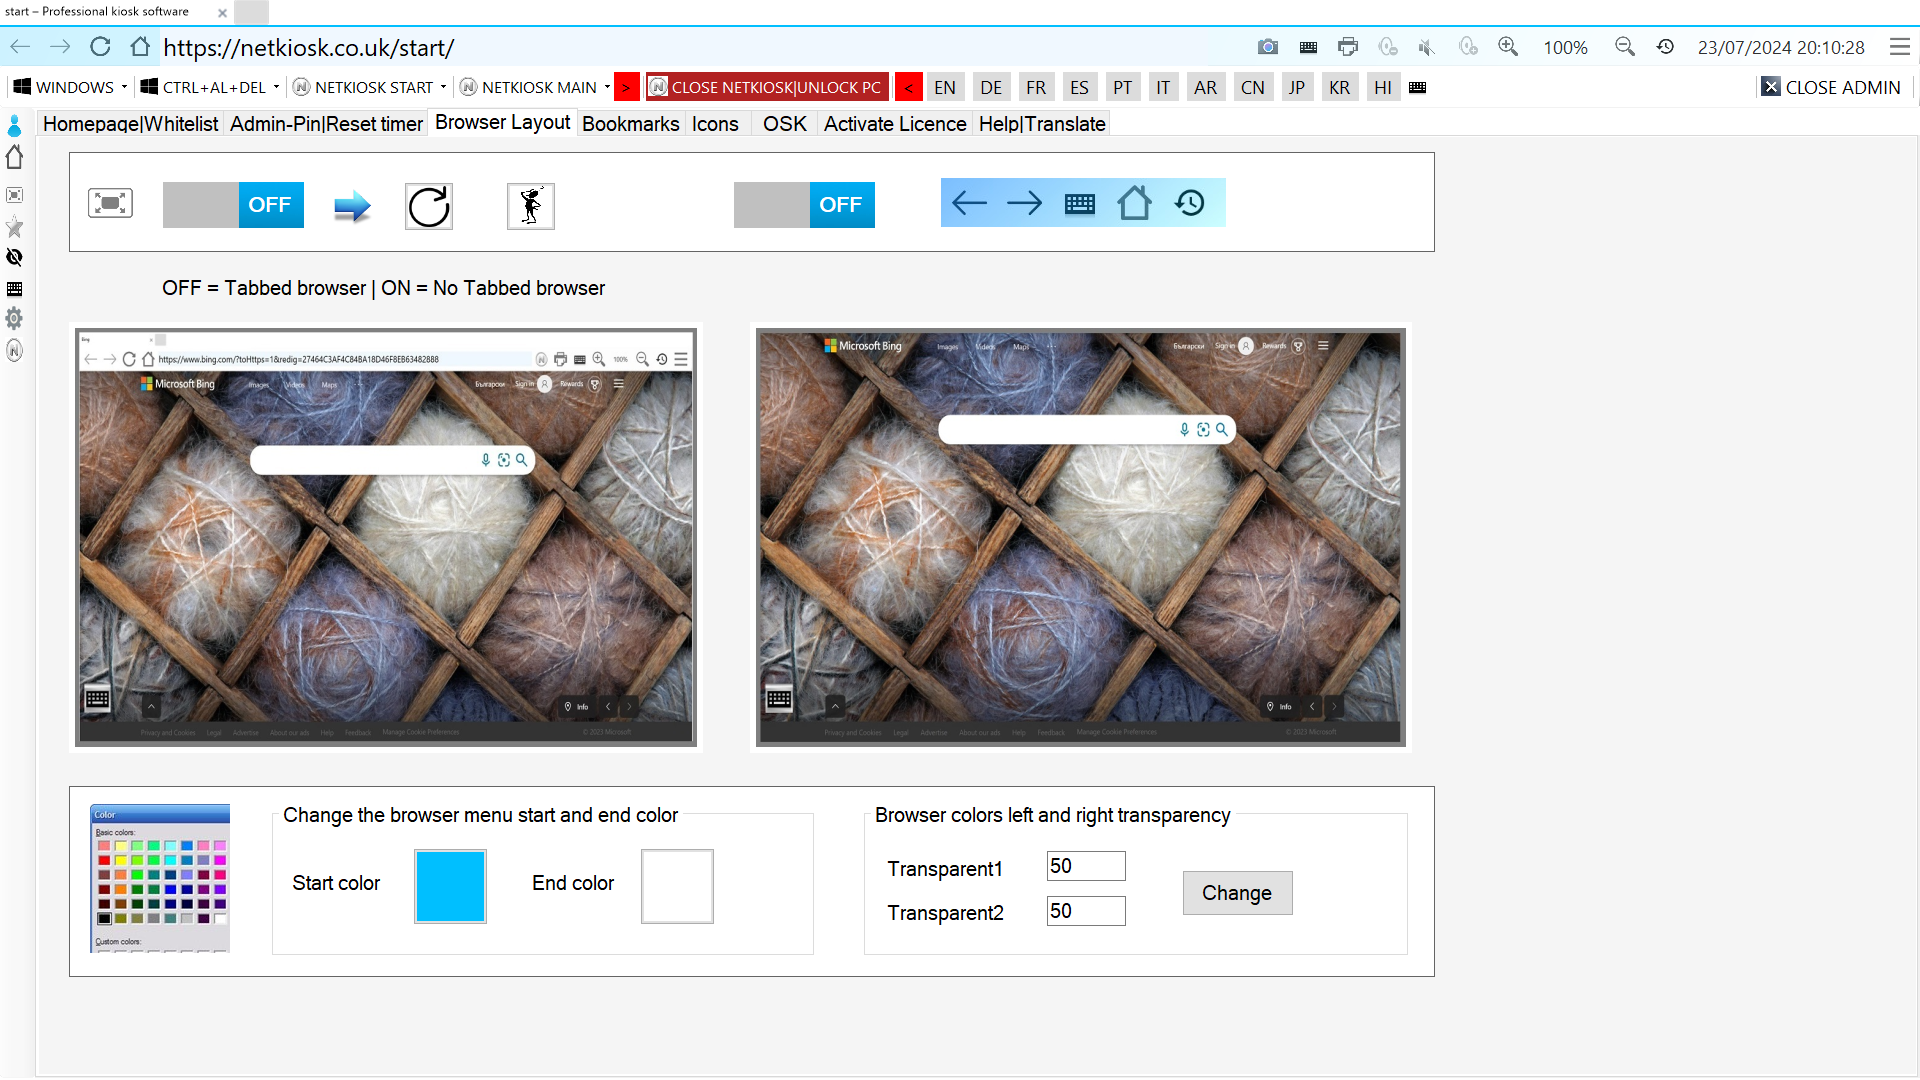
Kiosk browser layout.
Tabbed kiosk browser or interactive display kiosk mode.
Tabbed kiosk browser or full screen interactive display kiosk mode: Turn on full screen kiosk mode if you do not want your users to use the tabbed kiosk browser. In display kiosk mode, all menu bars are hidden, making Netkiosk ideal for interactive display kiosks. You have the option to show the floating navigation panel. This may be useful if you run Netkiosk without menu bars. Touch-screen keyboards are, of course, also available.
Change the browser menu bar colours: You now also have the option to change the colours of the top menu bar to any colour you like including transparency settings.
Custom Bookmark menu.
You can enable the bookmark menu bar and give access to extra websites. Admin can edit the websites and names here. If the white list is enabled in the first admin tab, make sure you add the bookmark site names to your white list as well. Only the website name (like a keyword) is needed in the white list. Not the entire https:/www. etc. Netkiosk checks the url for keywords, not the entire website.

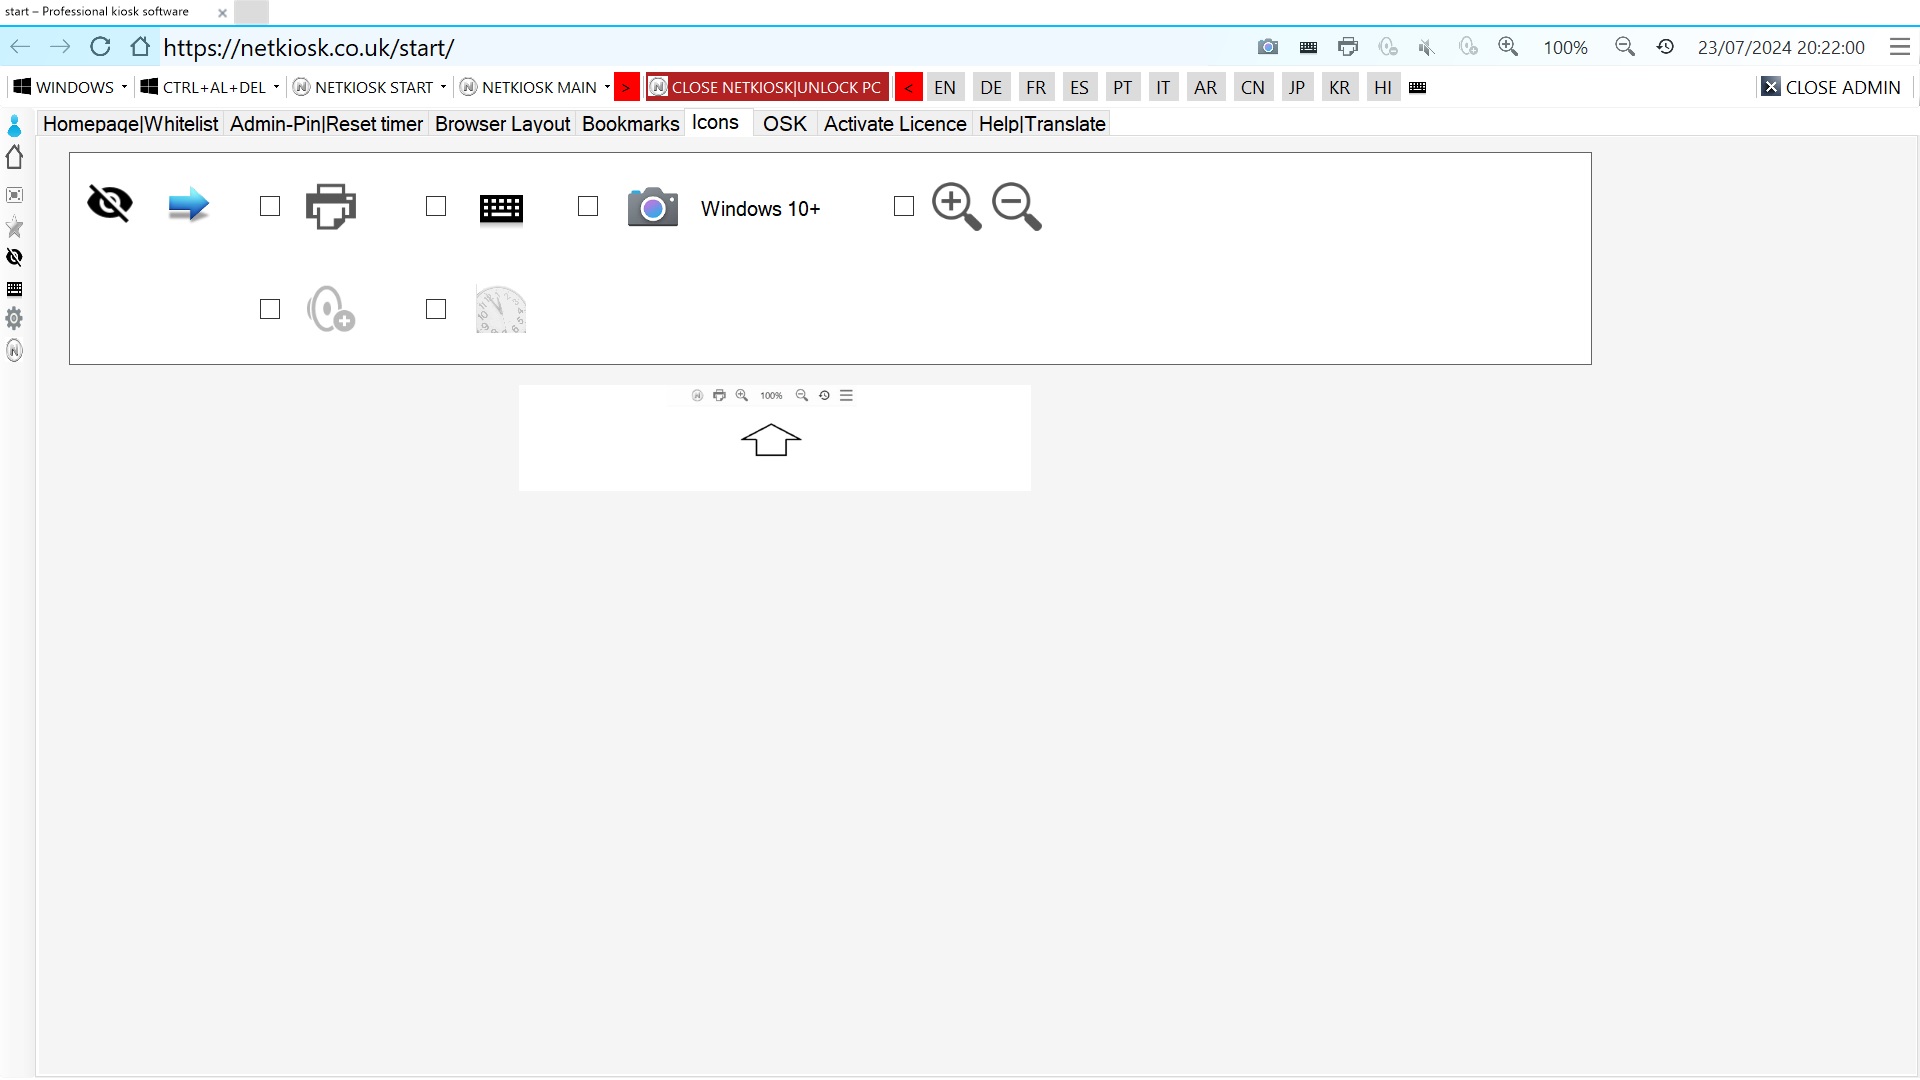
Multiple icon options.
By default the user has access to the Print, Camera, Volume, and zoom buttons. Admin can instantly hide these in admin settings.
Touch screen keyboards.
Netkiosk comes with a custom on screen keyboard. This is a small standalone program that you can find in the installation folder. It is simply called NetkioskOSK.exe.
You have the options to use the Windows OSK or any alternative third party OSK application.

How to close and shut down Netkiosk.
Latest version. (Currently on our site) A CLOSE NETKIOSK button is clearly visible in admin settings. When admin presses this button Netkiosk closes and the PC is instantly unlocked back to the Windows desktop.

Closing Netkiosk in a previous version. (You might already have this version installed)

How to automatically start Netkiosk when the PC starts.
You can instantly enable or disable Netkiosk auto-start. Netkiosk will automatically start after the kiosk user logs in. Netkiosk can run in shell mode, but this is not included by default. The reason for this is that it is a slightly more complex Windows setting that should only be used by IT experts.

The Ctrl+Alt+Del options menu icons.
For security reasons Microsoft does not allow you to completely disable the Ctrl+Alt+Del shortcuts. Instead, you can hide the icons on the options screen when you press Ctrl+Alt+Del. Simply press Ctrl+Alt+Del OFF to hide the icons or Ctrl+Alt+Del ON to show the icons. For IT experts or anyone familiar with the Windows registry we have included the Ctrl+Alt+Del registry files in the installation folder of the Netkiosk.

Windows shutdown, log off or restart.
You can even perform Windows shutdown, restart of logoff direct from within Netkiosk admin panel.

How to open the admin panel in display kiosk mode.
- Click in the bottom left hand corner to open the admin panel. There is an invisible button in the bottom left corner.
- You can also press in this area when using a touch screen.
- You can also press Alt+F5 or Ctrl+i.

Netkiosk imperi Pro 2024
Professional kiosk software for Windows 11 and 10 and MacOS.
Netkiosk imperi Pro 2024
Our brand new Netkiosk imperi version runs like a normal browser above the Windows Taskbar BUT with quite a few differences. The PC lockdown functionalities are directly integrated inside Netkiosk imperi Pro.
It is different from Netkiosk imperi version above in the sense that with this version you can now also control program access and give uses access to a standard locked down PC so they can use it as normal but in a more restricted mode but with some powerful admin control features added in. The only way to find out if this version will be useful for you is to download it and try it. And if you like it we can further customize it for you if needed.
Ideal for standard restricted user access:
This Netkiosk version might be ideal for use in libraries, Education or certain office environments.
Secure browser access only: Users can only use Netkiosk Pro secure browser. Access to browsers like IE, Chrome Firefox, Opera, Safari and Edge are blocked. And you can restricts program access also. More about this below.
Restricts system access:
Users cannot access Windows system settings and other Windows areas. Access to task manager. Regedit, command prompt, is also blocked.
The lockdown and restriction functionalities only work when Netkiosk imperi Pro runs. When admin closes Netkiosk imperi Pro via admin panel the PC is instantly fully unlocked so no complicated system settings changes required. Depending on your needs we can customize this further.
Secure tabbed browser only:
This version runs in tabbed kiosk browser mode only so it is not designed for information display kiosks. Please take a look at Khroma for that.
Restricting program access for the current Windows user:
This Netkiosk version allows you to restrict program access to only a few programs similar to Microsoft assigned access but with the difference that with Netkiosk imperi Pro 2024 you can give access to any Windows application and block all other program. This is done via a special Microsoft registry file. We have added an easy configuration option directly inside Netkiosk admin settings. If you need help with this please contact us. The settings are applied to the current Windows user and NOT the PC (Local PC) so your Windows admin account is not affected. If you need help with this please contact us.
Blocking Windows Dialogs:
You can block any Windows dialog in admin settings that you do not want users to open. These can also be program dialogs.
Runs from any location:
We have put the entire folder for Netkiosk imperi Pro 2024 in a zip file.
This makes it completely portable and requires no installation what so ever. NetkioskPro.exe (The actual program can be started directly from the folder or via any short cut you decide to create. Auto start is also possible.
How to configure auto start:
To enable auto start you first create a folder in Program Files and name it “Netkiosk imperi” (Without the ” “)
Copy all the files from the Netkiosk imperi Pro 2024 folder into the Netkiosk imperi folder.
Start NetkioskPro.exe and inside admin settings enable auto start. (This is a simple registry file)
You will find the registry file called “NetkioskLaunchStartup.reg” in the Netkiosk imperi Pro 2024 folder. As well as a few more registry files you can use.
We will add screen shots or a video soon.

Leading kiosk software development through innovation since 2011.
Powered by Microsoft and Chromium